fat bottom

fat bottom
Showing posts with label cake. Show all posts

Tuesday, September 18, 2012

banana chocolate chip cake and some other stuff

i feel like i'm in a bit of a funk lately... kinda like i'm suffering from a slight motivation problem... which is not a good thing when the hubby's away and the kids want to play...
i know for the most part it's because i am not feeling that well, blah blah blah... lingering health issues, blah blah blah... but i'm not going to bore you with that...
what i will do instead is share with you a quick and super easy recipe for banana bread... and right now on this chilly grey day, it's the perfect thing to warm you up a bit, not to mention it will make your house smell ahhhmazing!!
banana chocolate chip cake:
ingredients:
1 1/2 cups flour
3/4 cups of sugar
1 tsp. baking powder
1/2 tsp. baking soda
1/4 tsp salt
1/2 cup (1 stick) of butter, melted and cooled
1 1/2 cup of smashed bananas
2 lrg. eggs
1/2 tsp of vanilla extract
1/2 cup of chocolate chips

directions:
1. preheat the oven to 350, and grease and flour a 8x8 cake pan (you can actually make them into muffins too)
2. in a medium bowl, sift and combine all the dry ingredients
3. make a well in the center of the dry ingredients, and add all the wet ingredients plus the chocolate chips
4. incorporate the ingredients together, but don't overmix
5. spread the batter into the pan, and bake 30-35 minutes or do the ol' toothpick trick


in other news... i'm working on a fun giveaway for you all... i'm busy putting it together... but i promise it will be something fun :) so stay tuned!!
 
on a side note... my littlest guy started pre-k... it just blows my mind to think about it... he really likes school so far, even though he sometimes acts like he's too cool for it... honestly, this kid thinks he's a real bad ass... it makes me laugh
enjoy this cozy up weather... and as always... happy baking!

Tuesday, June 19, 2012

hey mommy, can we make an "apposaws" cake??

whenever my boys make a baking request of me, i always smile and oblige... even when they make some oddball requests, i usually end up tweaking them a little to make them appetizing... but lucky for me, my little guy made asked for me to make something delicious... after watching an episode of curious george, he came running up to me with a big ol' grin on his face, asking "mommy, mommy! can we make an apposaws cake?!?" at first all i did was laugh at the adorableness of his question... then i asked him why he wanted an "apposaws" cake, (which is an applesauce cake by-the-way)... and he looked at me and said very matter-o-factly "because mom... superheros need their energy"... well, when he put it that way... hahahaha, this kid cracks me up...
luckily for him i actually had applesauce in the house, so... request granted
applesauce cake recipe (adapted from smitten kitchen):
2 cups all-purpose flour
2 tsp. baking powder
1/2 tsp. baking soda
1/2 tsp. salt
3/4 tsp. cinnamon (i actually used a heaping teaspoon, maybe more)
1/4 tsp. nutmeg
1 stick unsalted butter, softened
1 cup packed light brown sugar
1 tsp. pure vanilla extract
2 large eggs
1 1/2 cups unsweetened applesauce

directions:
1. preheat oven to 35o, and place oven rack in the middle... butter or grease a 8- or 9-inch square cake pan
2. whisk together flour, baking powder, baking soda, salt, and spices
3. beat the butter, brown sugar, and vanilla with an electric mixer at high speed until pale and fluffy, 2 to 3 minutes... add eggs one at a time, beating well after each addition, then beat in applesauce
4. at low speed, mix in flour mixture until just combined... the batter will look a little curdled and uneven but don’t worry, it will all bake up perfectly in the end
5. spread batter evenly in pan and bake until golden-brown and a wooden pick inserted into center comes out clean, about 35 to 40 minutes... then cool in pan 15 minutes. Run a knife around edge of cake to loosen, then invert onto a plate
this cake is amazing... moist, cinnamony, not too sweet... just a really good, simple cake... it's something that will defiantly maintain in my baking repertoire...
the little dude couldn't wait until dinner was over, he kept staring at it with a big smile... and then the smile got even bigger once he took a bite... look at that adorable and goofy powdered sugar grin!
 have a great day guys... and as always happy baking!!

Saturday, January 21, 2012

dirty chocolate cake


the boys wanted cookies... i wanted something a little more exotic and challenging... the hubs asked for chocolate cake... why does this guy always get his way... i need to start reasserting my dominance as head of the house :) just kidding...

i'm just being too nice lately since he's leaving and will be suffering for 2 months without my home cooking and fatty desserts...

so here it is... a double chocolate cake... not a bad treat to be hanging about on the kitchen counter... i keep sneaking little slivers of cake every time i walk by, and then it's followed by cursing myself for having no willpower...

now... this cake was easy to make, requires minimal cleanup... it had a bit of a drier crumb, my hubs said it would be the perfect recipe for ice cream cake, and i think he's right...

one bowl chocolate cake
ingredients:
1 cup all-purpose flour
1 cup sugar
1/2 cup unsweetened cocoa powder
1/2 tsp baking soda
1/4 tsp baking powder
1/4 tsp salt
3/4 cup milk
1/3 cup cooking oil
1 tsp vanilla
1 egg

directions:
1. preheat oven to 350 and grease and flour your cake pan ( i made two 6 inch rounds)
2. in a large mixing bowl stir together flour, sugar, cocoa powder, baking soda, baking powder, and salt
3. add milk, oil, and vanilla... beat with electric mixer on low speed just until combined
4. beat on medium speed for 2 minutes... add egg... beat 2 minutes more
5. spread into prepared pans
6. bake 20-25 minutes or until a wooden toothpick inserted near center comes out clean... cool cake in a pan on a wire rack for 10 minutes before removing...
top of my head chocolate ganache frosting
ingredients (amounts unknown since i kinda threw it together)
1 cup chopped dark chocolate, melted and cooled
4 tbsp. butter, softened
heavy cream (as needed for consistency)
confectioners sugar (as needed for sweetness)
1-2 tsp. kahlua

directions:
1. melt chocolate over a double boiler, set aside to cool
2. beat butter in mixer, until smooth... then add melted chocolate and kahlua
3. start adding in the confectioners sugar and heavy cream until you reach your desired consistency and sweetness...

have a wonderful weekend everybody... and as always... happy baking :)

Friday, June 10, 2011

a sweet pick me up

good morning ladies and gents... i hope you are as excited as the weekend finally being here as i am... this has been one tough week for me... and i am just looking forward to relaxing with the hubby when he gets home today... maybe we'll order in some sushi, and pop that bottle of bubbly that has been waiting patiently in the fridge :)

so yesterday was just one of those days, i was feeling a bit blue and down and i was in need of a pick me up... so while i was checking out some of my favorite blogs, i stumbled across a post by
the kitchn... and a fabulous sounding cake... a dulce de leche banana cake...

ummm, yes please...

the recipe came from another blog,
bakers royale and not only was this cake delicious, it was super simple to make... the cake had a nice moist, tight crumb and was just sweet enough even without the added yumminess of cream cheese frosting...

dulce de leche banana cake (makes one 9 inch round or square cake)
ingredients:
½ cup sour cream
1 teaspoon baking soda
8 tablespoons unsalted butter, softened
1 cup sugar
2 eggs
1 teaspoon vanilla extract
2 cups flour
1 teaspoon baking powder
¼ teaspoon salt
1 cup mashed bananas (about 1 ½ large bananas)
¾ cup dulce de leche


directions:
1. place sour cream in a bowl and add baking soda; set aside
2. mix butter and sugar until light and creamy
3. add eggs in one at time and beat until combined, add vanilla and beat until combined
4. mix flour, baking powder and salt; set aside... then mix together the bananas, dulce de leche and the sour cream mixture

5. add the dry ingredients in three parts, alternating with banana mixture
6. mix after each addition until just combined
7. pour mixture into a greased and lightly floured cake pan and bake at 350 for about 45 minutes or until cake tester inserted in the center comes out clean

8. cool cake for 5 minutes in cake pan, then remove cake and continue to cake completely on a wire rack


top the cake with a delicious vanilla cream cheese frosting, and if you're feeling adventurous drizzle with a little more dulce de leche... just go bananas!


and not only did this cake give me a wonderful pick me up, but i got a beautiful surprise from my little sister meggie... this lovely bouquet of flowers... i love her so much, she really made my day :)

happy baking everyone :)

Tuesday, May 24, 2011

chocolate chip cookie cake

well good afternoon all... i hope everyone is enjoying their day... i know i am... i had a busy busy week... not only did i have the privilege of making cupcake favors for one of my very best friends wedding... i was also one of the bridesmaids... it was a spectacular wedding... we all looked beautiful, the bride especially... the party was rocking, we danced the night away to an awesome band, ate some amazing food, and had a lot of laughs... but as for now, my dancing shoes are off and i am relaxing...

so... back to the kitchen...

here is a yummy little treat that my little guy jack was begging me for... his words were: "mommy, you know what would be awesome... a giant cookie cake... with m&m's... and frosting... lots of frosting... and even more m&m's... and don't forget the chocolate chips..."

so i busted out a 10 inch spring form pan, mixed up dorie greenspans best chocolate chip cookie recipe, and got to baking...once cooled i decorated this tasty treat with some creamcheese frosting, and sprinkled the heck out of it with some mini m&m's (as per jacks request)


dorie greenspan's best chocolate chip cookie recipe:
*i halved the recipe*
ingredients:
2 cups all-purpose flour
1 tsp salt
3/4 tsp baking soda
2 sticks unsalted butter, at room temperature
1 cup sugar
2/3 cup (packed) light brown sugar
2 tsp pure vanilla extract
2 large eggs
12 ouncs bittersweet chocolate, chopped into chips, or 2 cups store-bought chocolate chips or chunks
1 cup finely chopped walnuts or pecans(optional)

directions:
1.center a rack in the oven and preheat the oven to 375 degrees F, lightly grease the sides and bottom of a spring form pan
2. whisk together the flour, salt, and baking soda
3. working with a stand mixer, preferably fitted with the paddle attachment, or with a hand mixer in a large bowl, beat the butter at medium speed for about 1 minute, until smooth
4. add the sugars and beat for another 2 minutes or so, until well-blended, then beat in the vanilla
5. add the eggs one at a time, beating for 1 minute after each egg goes in, then reduce the mixer speed to low and add the dry ingredients in 3 portions, mixing only until each addition is incorporated
6. on low speed, or by hand with a rubber spatula, mix in the chocolate and nuts
7. evenly spread the dough into the pan, pressing it down lightly
8. place the spring form pan, on top of a baking sheet and bake in the oven for about 20-25 minutes, rotating halfway... remove from oven and let cool before frosting :)


happy baking everyone!!

Friday, May 6, 2011

happy birthday to my amazing hubby!

hey everyone! hope you're all doing fabulous today... i just want to take this time out to wish the love of my life a happy birthday... i bust his balls that he's an old man now that he's turned thirty, but to me he's still that cute 23 year old guy who stole my heart...


did i ever tell you guys how we met?? i was actually his boss at abercrombie and fitch... although, he never really did listen to me at work... but something just clicked between us, and before i knew it we were a family... and i couldn't be happier :)

so for my hubby, i wanted to combine lots of delish-ious flavors... so i made two layers of vanilla cake, a fudgy brownie layer, and topped them with peanut butter cream and vanillabean buttercream... it was sinfully good... almost too rich that my thighs were burning... but hey, each bite was worth it!!!
how good does that look!! and if everyone wants the recipe let me know... it is amazingly good!!


here are the three loves of my life... my three men :)


all my love to my awesome hubby... wishing you a very happy birthday...


and as always... happy baking everyone!

Wednesday, May 4, 2011

i'm back baby... how about some upside down banana cake

hello baking world! i have returned!!


get ready for a whole landslide of back to back posts people.... i have lots to share... and all are so-so yummy!! i'm going to start off with a delish-ious sugary, sticky sweet banana upside down cake... i'm going to apologize by saying that these pictures don't do any justice for this delectable cake... but i still have to share...


who doesn't love caramelized, well...anything!!! this cake itself is slightly sweet, and just dense enough... the bananas weren't too soft, kind of almost bruleed in the brown sugar... which gave a slight sugary crunch... so, next time you have ripe and ready bananas, skip the got0 banana bread, and go for this... you won't be disappointed :)


banana upside down cake (recipe from baking bites):
ingredients:
1 cup brown sugar
2 tbsp butter
2 tbsp lemon juice
1/8 tsp salt
2 large bananas (or 3 small)
1/2 cup butter, room temperature
1 1/2 cups sugar
2 large eggs
1 tsp vanilla extract
1 tsp cinnamon
2 cups all purpose flour
2 tsp baking powder
1/2 tsp salt
3/4 cup milk


directions:
1. preheat oven to 350
2. lightly grease a 9-inch spring form pan and wrap the outside bottom of the pan well with foil (this will prevent caramel from leaking out and making a gooey mess)
3. in a small microwave-safe bowl, melt together 2 tbsp butter and lemon juice, then stir in the brown sugar... pour the mixture into the prepared pan and spread evenly
4. slice the bananas on the diagonal, making each slice approx. 1/4-inch thick, and arrange in a single layer in the brown sugar mixture on the bottom of the pan, set aside
5. in a large bowl, cream together butter and sugar, then beat in the eggs one at a time, followed by the vanilla and cinnamon

6. in a small bowl, stir together flour, baking powder and salt... add the flour mixture in two or three additions, alternating with the milk
7. pour batter into pan and spread evenly, ensuring that all banana slices are covered
8. bake for 80-90 minutes, until a tester inserted into the center comes out clean and the cake springs back when lightly pressed
9. once the cake is out of the oven, run a knife around the edge of the pan to loosen and turn cake out onto a plate... let cool to warm or room temperature before serving


i wish my pictures came out a bit clearer and more detailed... i was just having a bad camera day :(

well, until next time... happy baking everyone :)

Wednesday, March 9, 2011

whoopie pies!!

i don't know where i stand with whoopie pies... i mean, don't get me wrong...they are delicious... what's not to like about a portable piece of cake... but i don't know... maybe it's the cupcaker in me that makes me a little stand-offish to what i guess would be a cupcakes' 2nd cousin... or maybe it's that i just prefer a softer more tender piece of cake...

so to help make up my mind, i enlisted the help of one of my new favorite baking books... baked explorations... and armed with their recipe and a hunger to get to the bottom of this dilemma, i set out to make some chocolate whoopie pies...

the result... i'm still up in the air... these whoopie pies baked up nice, firm but still soft, with a delicious sorta crust on the outside, and just chocolaty enough... and that was a nice contrast to the smooth and billowy vanilla buttercream center... even as i write this i'm shaking my head about how i still can't decide if i'm a fan or not... what's wrong with me!!

anyways... maybe one day i'll fully hop on board the whoopie train... but until then, i'm still a cupcake kinda gal...
chocolate whoopie pies, from Baked Explorations
yields 10-12 large whoopie pies or 15-17 small pies
ingredients:
3 1/2 cups all purpose flour
1/4 tsp salt
1 1/4 tsp baking powder
1 1/4 tsp baking soda
3/4 cup dark cocoa powder, sifted
2 tsp instant espresso powder
1/2 cup hot coffee
1/2 cup hot water
2 cups light brown sugar, packed
3/4 cup canola oil
1 large egg
1 tsp vanilla extract
1/2 cup buttermilk, shaken
directions:
1. preheat oven to 350 and line baking sheets with parchment paper
2. in a medium bowl, combine the flour, salt, baking powder, and baking soda
3. in a large bowl, whisk together the cocoa powder and espresso powder, pour the hot coffee and hot water over the cocoa mixture and whisk until the mixture is completely smooth
4. in another medium bowl, combine the canola oil and light brown sugar, add this to the cocoa mixture and whisk until combined
5. add the egg, vanilla, and buttermilk and whisk until smooth
6. gently fold the flour mixture into the cocoa mixture
7. using a ice cream scoop, drop batter onto prepared baking sheets, leaving about 2-3 inches between them
8. bake 10-15 minutes, until the cookies crack slightly on top and spring back in the center when gently pressed
9. let cool completely, then remove from sheet with an offset spatula
10. pipe or scoop half of the rounds with the filling, then top each piped round with the other half and serve
well... until next time... and as always... happy baking everyone!

Wednesday, February 2, 2011

new york state of mind...

here's a little slice of love for all my new yorkers who are being bullied by jack frost... with weather like this it's no good just to warm up your body, you need to get down and warm up that soul... it's miserable out there, so lets put a smile on...

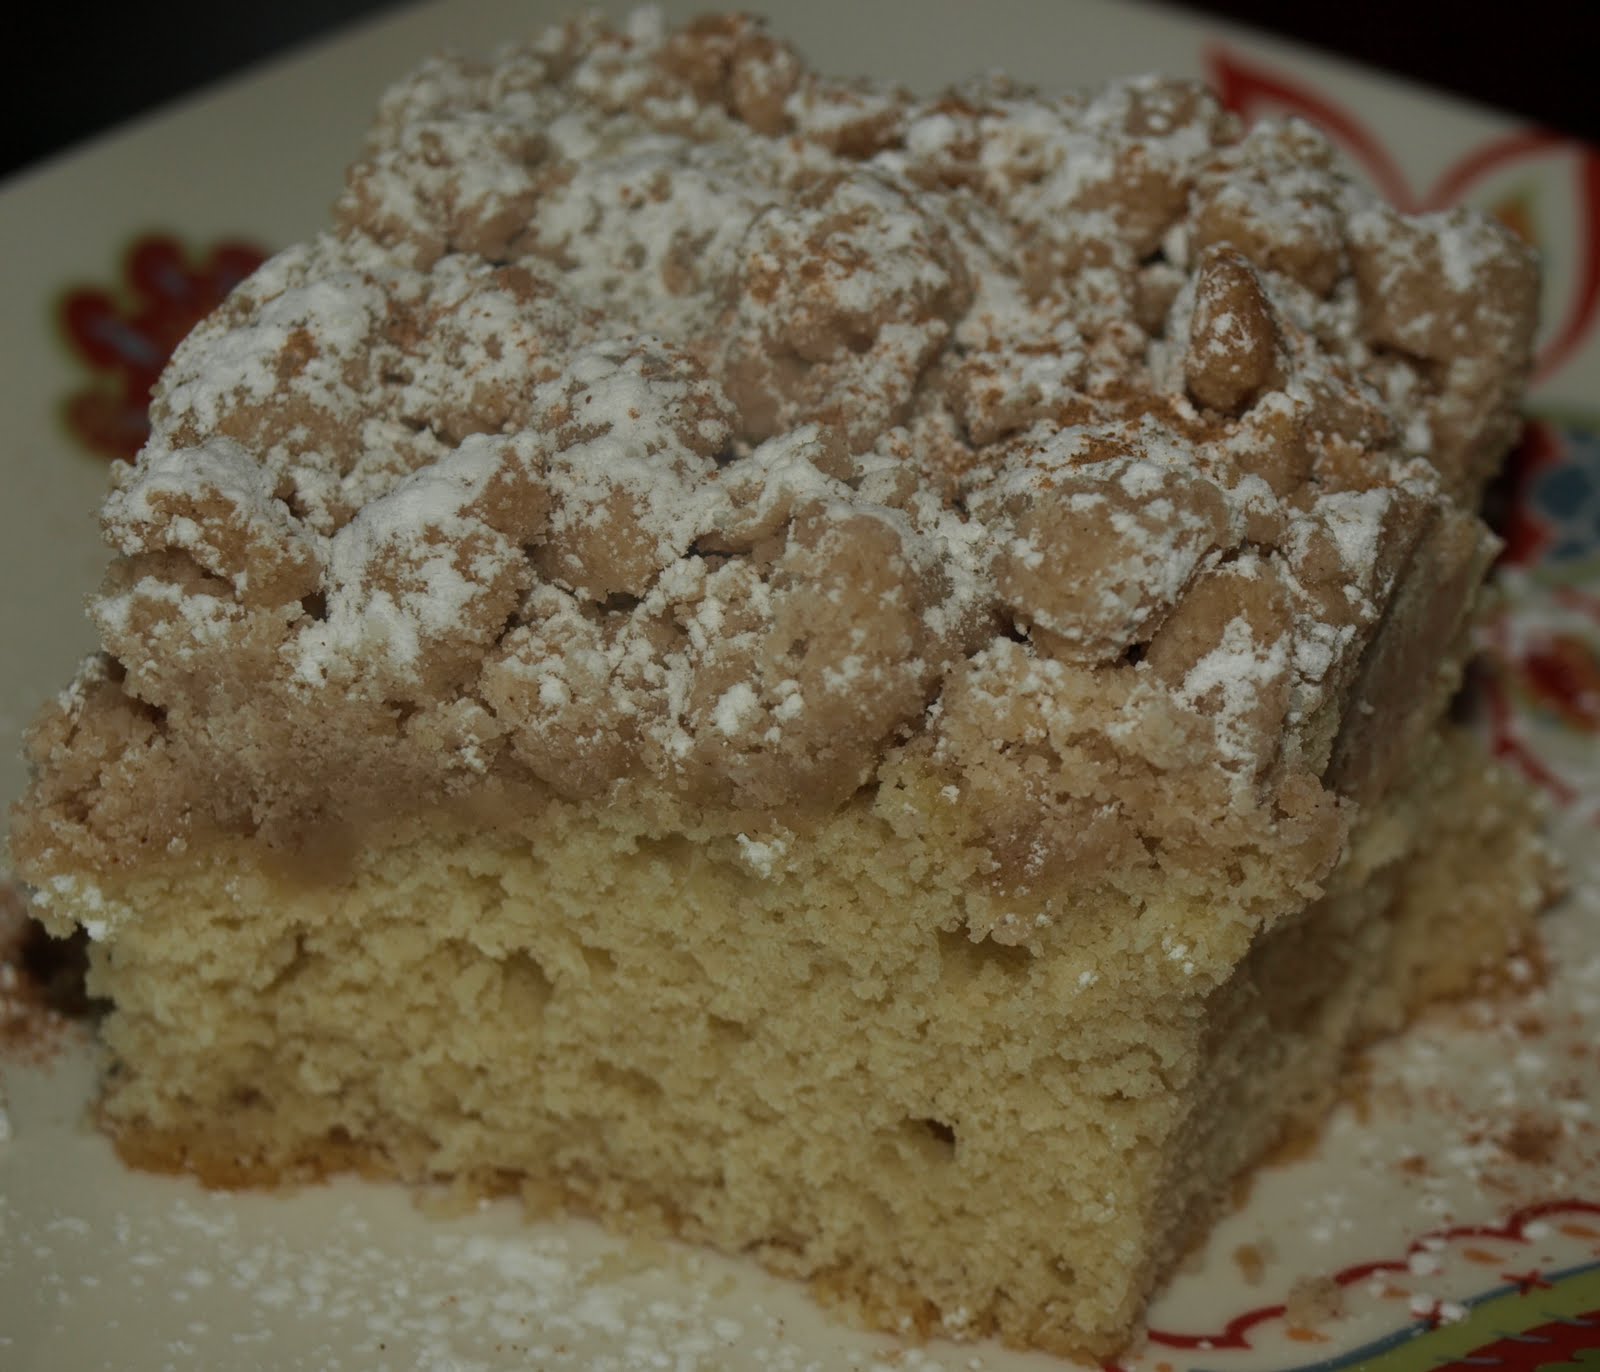
so go grab yourself a cup of new yorks best deli coffee (you know, the type that comes in those greek cups), and grab yourself a big hunk of coffee cake... but not just any coffee cake... THIS COFFEE CAKE... well, i guess if you were to grab yourself a slice you're going to have to roll up those sleeves, preheat your oven to 325 and crack some eggs... but hey... it's worth it... trust me... (thank you for this recipe mr. christopher kimball, i could grab you by your bowtie)

and not only will it warm up your house with the sweet smells of cinnamon and nutmeg, maybe even a little cardamon if you like... but it will certainly satisfy... with huge chunks of buttery, caramely spicy crumbs, and a moist slightly vanilla cake... mmmm...
New York-Style Crumb Cake (adapted)

for the crumb topping:
ingredients:
2/3 cup sugar
2/3 cup brown sugar
1 1/2 tsp. ground cinnamon (i used way more, like 3 tbsp, and added some nutmeg)
1/4 tsp. salt
16 tbsp. unsalted butter (2 sticks), melted and still warm
3 1/2 cups cake flour

for the cake
ingredients:
2 1/2 cups cake flour
1 cup sugar
1/2 tsp. baking soda
1/2 tsp. table salt
12 tbsp. unsalted butter (1 ½ sticks), cut into 12 pieces, softened)
2 large eggs
2 large egg yolks
2 tsp. vanilla extract
2/3 cup buttermilk
and some confectioners' sugar for dusting

directions:
1. for the crumb topping, mix together sugars, cinnamon, salt, and butter in medium bowl to combine
2. add flour and stir with rubber spatula or wooden spoon until mixture resembles thick, cohesive dough; set aside to cool to room temperature
3. for the cake, adjust oven rack to upper-middle position and preheat to 325, line a 13x9 pan with a parchment paper sling (spray the pan with cooking spray, lay in a sheet of parchment, pushing it into corners and up sides, allowing excess to overhang edges of dish, creating a sling for easy removal
4. in bowl of standing mixer fitted with paddle attachment, mix flour, sugar, baking soda, and salt on low speed to combine
5. with mixer running at low speed, add butter one piece at a time; continue beating until mixture resembles small moist crumbs, with no visible butter chunks remaining, for about 2 minutes
3. add egg, yolk, vanilla, and buttermilk and beat on medium-high speed until light and fluffy, about 1 minute, scraping once if necessary
4. transfer batter to prepared baking pan using rubber spatula, spread batter into even layer
5. form crumb topping into large pea-sized pieces and spread in even layer over batter, beginning with outer edges and then working toward center
6. bake until crumbs are golden and wooden skewer inserted into center of cake comes out clean, about 45 minutes
7. cool on wire rack at least 30 minutes, then remove cake from pan by lifting parchment
8. generously dust with confectioners sugar just before serving

oh by the way... being miserable and treating others like dirt is every new yorkers god given right... and on that note... happy baking everyone :)

Friday, January 28, 2011

a daring bakers delight

this months daring bakers challenge was hosted by Astheroshe from the blog, "accro", and let me tell you, this was one fun challenge... our mission was to make a "Joconde imprime /entremet", sounds fancy doesn't it... well, it is french :)
so what is this joconde imprime you may ask... well... i'll tell you, and in words not written by myself:
A joconde imprime (french baking term) is a decorative design baked into a light sponge cake providing an elegant finish to desserts/torts/entremets/ formed in ring molds. A joconde batter is used because it bakes into a moist, flexible cake. The cake batter may be tinted or marbleized for a further decorative effect.
This Joconde/spongecake requires attentive baking so that it remains flexible to easily conform to the molds. If under baked it will stick to the baking mat. It over baked it will dry out and crack. Once cooled, the sponge may be cut into strips to line any shape ring mold.
Entremets (French baking term)- an ornate dessert with many different layers of cake and pastry creams in a mold, usually served cold.
so this is what i whipped up... two, 4 inch mini joconde's (i go mini now because the hubs isn't here to help me eat all the fatty goodness)... 1 was filled with two types of sweetened mascarpone (thats the one with the chocolate shavings), and the other filled with chocolate and vanilla mousse's (that's the one with the raspberries, and is more of a traditional looking joconde/entremet)...
well... enjoy these, i know i sure did, my thighs on the other hand did not... :(
chocolate piping batter, makes about 2 cups

ingredients:
1 stick unsalted butter, cut into pieces, room temperature
1 cup confectioners' sugar, sifted
4 large egg whites, room temperature
1/4 teaspoon pure vanilla extract
3/4 cup plus 1 tablespoon all-purpose flour
1/3 cup unsweetened Dutch-process cocoa powder, sifted

directions
1. process butter and confectioners' sugar in a food processor until fluffy, while machine is running, gradually add egg whites and vanilla, and scrape down sides of bowl, add flour, and process until combined
2. transfer to a bowl, and stir in cocoa powder with a rubber spatula
3. for piping, transfer to a pastry bag fitted with a 1/16-inch plain round tip (such as Ateco #2), piping batter can be refrigerated in an airtight container for up to 3 days; bring to room temperature and stir before using

4. atop a piece of parchment paper, pipe any design you would like, like curls or anything your pretty little heart desires, then freeze for about 15 minutes while making the joconde

Joconde Sponge, makes two ½ size sheet pans or a 13” x 18” jelly roll pan

ingredients:
¾ cup almond flour
½ cup plus 2 tablespoons confectioners sugar
¼ cup cake flour
3 large eggs

3 large egg whites
2½ tsp. sugar or superfine (caster) sugar
2 tbsp. unsalted butter, melted

directions:
1.in a clean mixing bowl whip the egg whites and white granulated sugar to firm, glossy peeks, reserve in a separate clean bowl to use later
2. sift almond flour, confectioner’s sugar, cake flour
3. on medium speed, add the eggs a little at a time, mix well after each addition, mix until smooth and light
4. fold in one third reserved whipped egg whites to almond mixture to lighten the batter, fold in remaining whipped egg whites, *do not over mix
5. fold in melted butter
6. pour the Joconde batter over the design, spread evenly to completely cover the pattern
7.Bake at 475ºF until the joconde bounces back when slightly pressed, for about 5 minutes, it is a very quick bake, so watch carefully
8. cool but do not leave too long, or you will have difficulty removing it from mat
9. flip cooled cake on to a powdered sugared parchment paper, remove silpat, cake should be right side up, and pattern showing, the powdered sugar helps the cake from sticking when cutting


looks good in there, doesn't it... oh yea...


and here's my little man, ben... my 2 year old enjoying a joconde... haha... makes me smile
get daring! and happy baking everyone!